Back to Kodak

It has been far too long since I put a post up so here goes. Unfortunately I really haven’t had much chance to shoot a great deal of film in the last 12 months or produce anything worth while since my trip to the Arctic. Hopefully that is about to change with an imminent trip to the red centre! Now, back to what I really want to walk about – Kodak. I’ve been using a lot of Fujifilm Acros 100 lately, a beautiful film with a unique look. However, if you want fine detail it doesn’t compare to Kodak Tmax 100 or if you’re after grain then Kodak Tri-X 400 is unmatched. In fact the versatility of Tri-X 400 is unmatched in my opinion. I’ve ruined more than a few shots trying to use Acros 100 when I really needed a faster film. Add in the news that Kodak are beta testing their new Ektachrome 100 with photographers in the US with a release date of later this year and you have a recipe for change! Sorry Fujifilm, I love the reds and blues of Veliva but the quality control and reliability of Kodak film is more than enough for me to switch for good. C-41 film isn’t really my thing so I can foresee a well stocked fridge of Ektachrome and Tri-X. Besides Kodak made Aerochrome and that stuff is down right incredible.

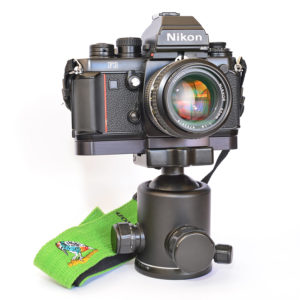
Nikon F3 Plate (CP-F3)

After a few 3D printed prototypes and some refining, I finally have 2 CNC machined aluminium camera plates for my F3 cameras. They are anodised to match use the arca-swiss dove tail. They also have space for spare batteries, a motor drive cap and a 10c piece. I’m very happy to finally have a finished result that matches seamlessly with the lines of the camera. Less is always more when it comes to good design. I’ll be investigating how I can economically get a small batch of these made up should interest be sufficient. In the mean time, this is my answer to the Leicavit, the Nikovit!

Update

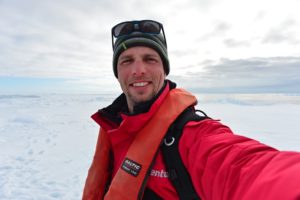
After 15 flights, nearly 60,000km and a 30th birthday all in this last month, I’m ready to sit down a relax for a little while. It’s also why I’ve been fairly quiet on here. I have about 200 digital images to go through from my trip to Svalbard and Norway as well as 4 rolls of film that are in for developing.

Large Format Workshop

Last weekend I was fortunate enough to spend my Sunday hanging out with some genuinely amazing people learning how to use large format (4×5) cameras and talking all things film. The Analogue Laboratory is an artist run community darkroom facility within the heart of the Adelaide CBD. Created and managed by Alex and Aurelia, their passion (and knowledge) for all things analogue is contagious. They run a number of different courses throughout the year depending on what your needs are (large format, darkroom basics, cyanotypes etc). So, why go and play with a large format camera? Well, why not! I’d played with the idea of getting one some time ago but settled for my GW690III for film economy and use in aerials. However being a bit mad on film I really wanted to experiment with one as it’s a significant departure from using roll film (135 or 120). So, doing a course was a no brainer as I don’t study photography or have a friend with a 4×5 camera. The large format course runs all day but has a gentlemanly start time of 10am. Covering a bunch of history and theory behind large format, Alex and Aurelia do a great job of imparting their wisdom before you get to practice loading film. Then a couple street and a couple of studio shots later I had 4 images ready to develop. Queue some tasty lunch! Following a stint in the darkroom developing and eagerly awaiting the results we also tried some New 55 instant 4×5 film (colour and monochrome) with mixed opinions. All in all, I ended up with six pleasing images but more importantly the memory of a very happy day! If you’re interested I can highly recommend the experience.

JCH – In Your Bag

What’s in my bag you ask? Well thanks to Bellamy Hunt (aka Japan Camera Hunter) you can find out what I like to roll around the streets with right here!

Interview with Emulsive

If, after trawling through the ramblings and images I have on this website you still want to know why I shoot film in 2017, head over to Emulsive to find out! It’s a great resource of all things film photography.

Ektachrome

Kodak has seen a resurgence in it’s analogue print film (and to an extent it’s motion picture stock) in recent years. However, I didn’t think they would ever re-start Ektachrome (or any E6 stock). Thus, it was wonderful to hear the news from the first day of CES 2017 that Kodak have decided to bring back Ektachrome. Ektachrome E100VS was a favourite of mine until it was discontinued in 2012. I was always disappointed for not shooting more of it. It’s early days and Kodak quote Q4 of 2017 for initial availability. I can’t wait!

Interview with Casual Photophile

I was recently picked for an interview by a great new analogue photography blog called Casual Photophile. Head over to the ‘Featured Photophile’ section and check it out!

Solargraphy

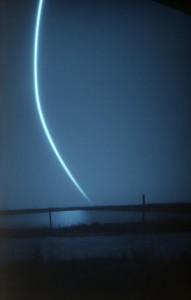
With a new Epson V800 scanner beside me, I’m now able to show you my first attempt at Solargraphy (imaging the sun’s path). A few months ago I designed and 3D printed a pinhole camera to fit some Ilford Photo Paper (3.5×5.5in). Having made a couple of unsuccessful trial images (the images were okay but didn’t capture the sun..) I pointed the camera West for a few days to make the image you see here. The process is quite unique in that the paper is not exposed/developed like a traditional print. A negative image is burnt into the paper over time (anything from a day to 6 months). Once retrieved it is then fixed (optional) and scanned to produce a positive result. The really unique aspect of this process is that it also captures the percentage of sunlight seen in a location over a given time. I hope to make a few more images during 2017.

Preserving the Past

As the title suggests, I’ve made a start on preserving my Dad’s entire film collection. Daunting to most, it’s an absolute must if you wish to retain those family memories. Unfortunately, most peoples film experience was cheap 35mm Kodak Gold and 1hr processing at the local chemist. This means silly 4 frame strips of film and adhesive tape between rolls which, if not removed, can leave a sticky residue. About 80 rolls of film later and some wonderful archiving products from a local Adelaide company Albox, I’ve managed to sleeve everything over the course of 3 or 4 evenings. Far from finished, this has at least saved the negatives which were stored together and allowed me to get a feel for the extent of the project. It’s also re-affirmed the importance of doing this and lack of care taken by old hourly processing labs (finding a good pro lab is a must! I’m lucky to have Atkins Pro Lab around the corner). For the keen eyed, you may also notice some single perf film as well as the standard 35mm. So what’s next? Well there’s a box of 6×6 Ektachrome slides to sort and sleeve and then its time to buy a scanner. This is where the time consuming part really starts! It will take a long time to digitise all of this but, when it’s done, the smile on my parents (and brothers) faces will be worth every penny.